http://sharky-fourbees.blogspot.com/2011/02/model-1917-remington-bayonet.html
Well since then, the bayonet has found a new home. I passed it to my uncle who has three vintage US Model 1917 Enfields from WW1. The bayonet fits the rifles perfectly, but there was one problem, there was no scabbard!
Original scabbards for these old M1917 bayonets can go for "insane" prices these days, so my uncle did what any good collector would do....... he found a reproduction scabbard on eBay for cheap! Then he sent it to my workshop for a complete overhaul and "Museum Replica Restoration". It took a few days of detail work, but the results were outstanding! The scabbard looks and feels like it is an actual, vintage WW1 scabbard that matches the bayonet. I sent the bayonet and scabbard back to their new owner where they are on display with the rifles.

Here is an outstanding article on the original Model 1917 U.S. Enfield rifles:
http://www.americanrifleman.org/articles/2012/4/19/the-model-1917-us-enfield/
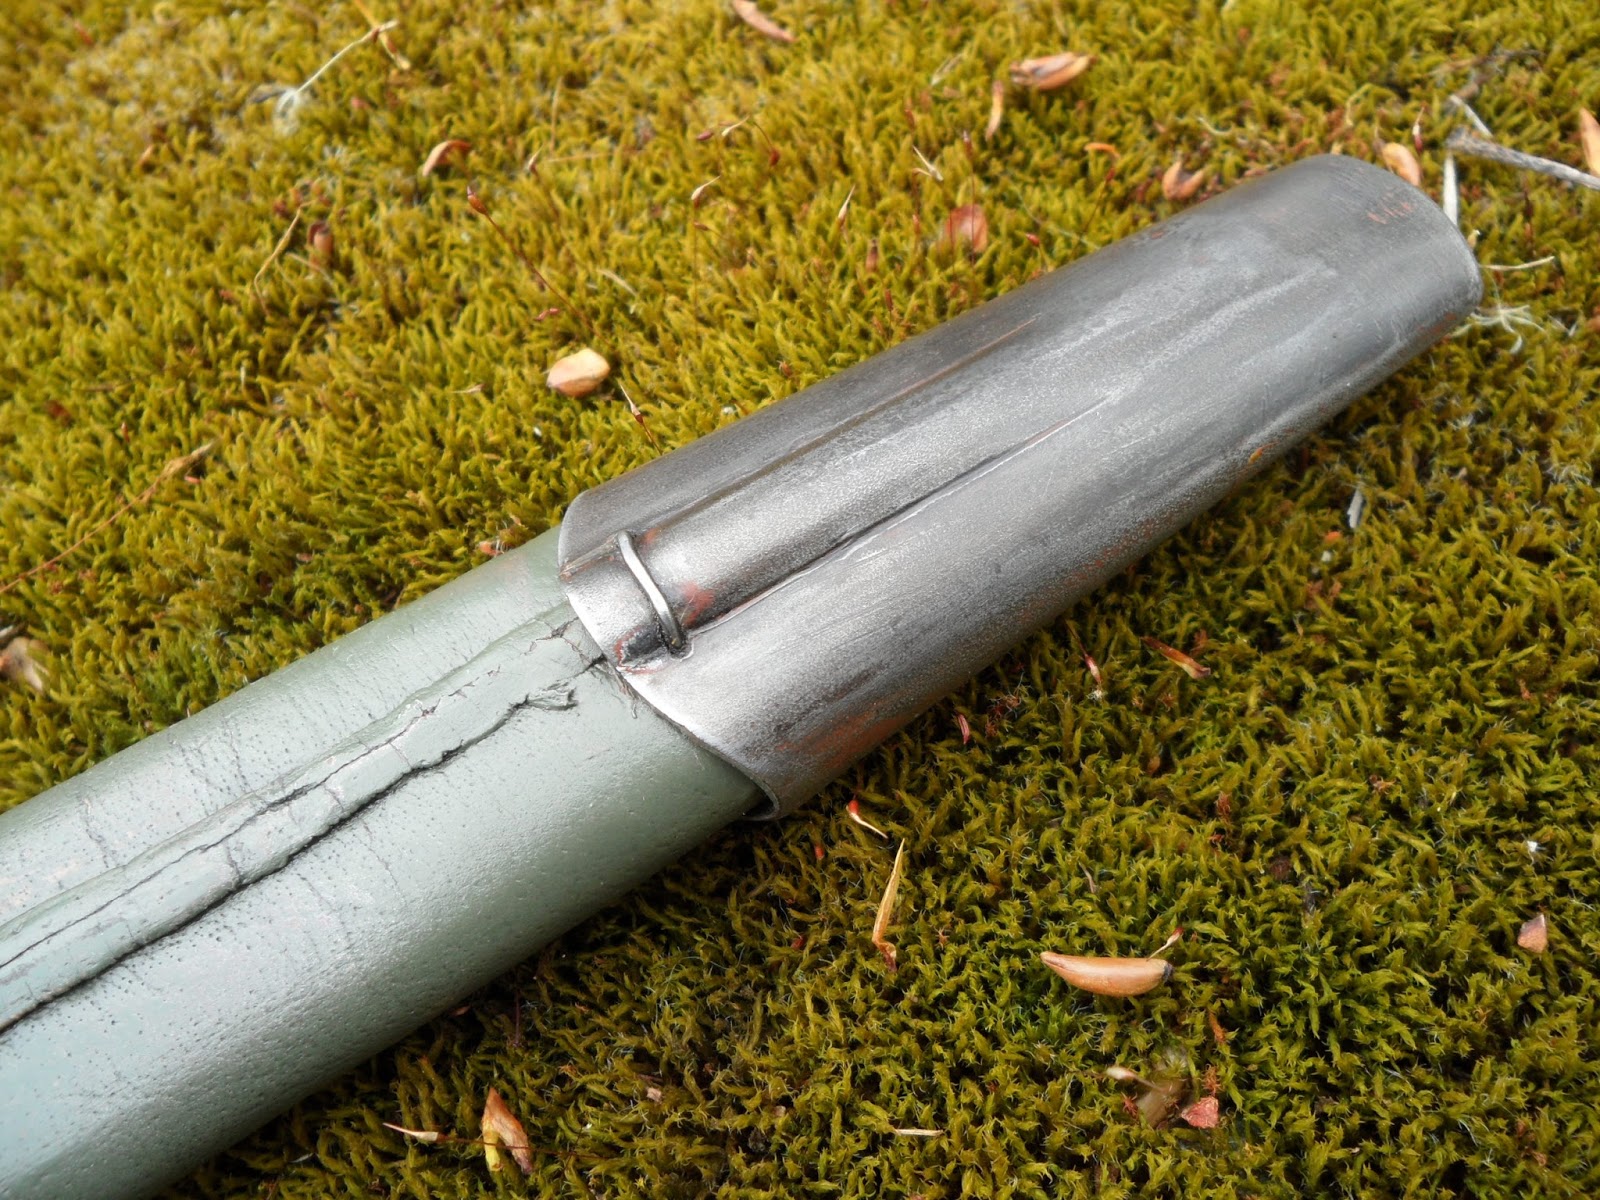
The reproduction scabbard had no markings, was painted OD Green over the entire surface and the wire hanger was installed backwards. Good bones, but in need of some accurate "restoration" attention.

I started out by stripping the paint from the metal.

"Aging and distressing" the metal.

Distressing and breaking in the painted leather scabbard, including the addition of "micro cracking", just like one would expect to see on an original.


The metal was aged further with cold blue paste, and then buffed with steel wool.......a number of times. I worked from photographs of confirmed original scabbards to get the overall appearance of the metal correct. I then fine-tuned the wear to match the finish on the bayonet.

Then I coated the entire scabbard with my "secret funk paste" to duplicate years and years of grease, dirt and grime, working it into the nooks and crevices.......and dulling out the paint. A few coats of this paste, with liberal buffing with a rag between coats, and the effect was perfect.

I removed and reinstalled the wire hanger in it's correct position and the scabbard was ready to go.

Not bad for a "Museum Replica Restoration"! I think that it would take someone with an expert eye and a lot of experience handling original M1917 bayonet scabbards to determine that this is actually a replica!
Here are a few "before" photos so you have something to compare to the "after" photos that follow:


Here is the finished scabbard with the original bayonet:


3 comments:
Not sure if you still check this, but I have the same repro scabbard and am looking to do the same thing. THis was a really helpful article and your scabbard looks great. What did you use to strip the paint off the metal parts?
I used some acetone thinner, a 3M scrub pad, and little 220 wet-dry sandpaper to remove the OD painted finish. Work slow and scrub lightly!
Thank you! I appreciate it. I might give it a try this weekend.
Post a Comment